How to Photograph Northern Lights – Complete Camera Guide
Witnessing the Northern Lights is an unforgettable experience, but capturing them in a photo requires some preparation. Because you are shooting in the dark and auroras move, automatic settings rarely work. In this guide, we share the best settings and tips for successful aurora photography.
⚡ Key Takeaways / Quick Summary
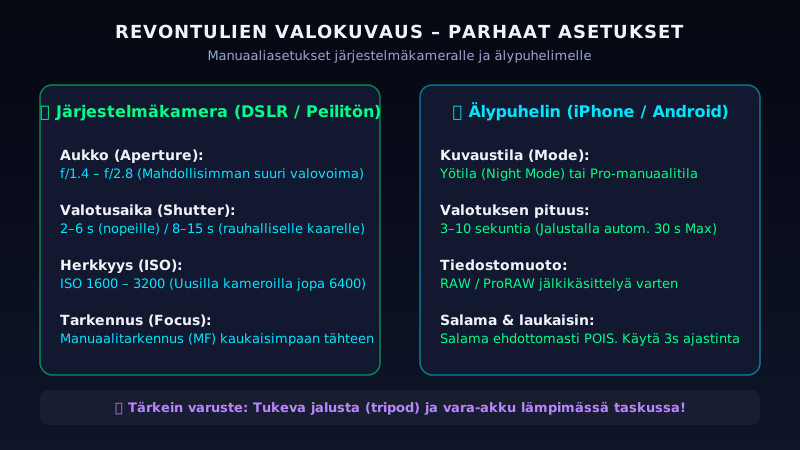
- Use manual mode (M) with a fast wide-angle lens (f/1.4 to f/2.8) and a stable tripod.
- Set shutter speed to 2–6s for fast-moving corona displays, and 8–15s for steady arcs. Keep ISO between 1600 and 3200.
- Always manual-focus on a distant star, turn flash off completely, and use a 2–3s shutter delay timer.
1. Essential Gear for Aurora Shooting
Before adjusting your camera settings, make sure you have prepared these two critical pieces of gear:
- A Sturdy Tripod: Since exposure times will be several seconds long, your camera cannot shake even a millimeter. Holding it in your hands will always result in blurry photos.
- Spare Batteries (Kept Warm): Cold sub-zero winter temperatures drain camera and phone batteries extremely fast. Keep your spares in an inner pocket close to your body heat until you load them.
2. Recommended Settings (DSLR / Mirrorless Cameras)
Switch your camera to **Manual Mode (M)**, use a wide-angle lens, and start with these base settings:
- Aperture (f-stop): Set your aperture as wide as possible (e.g. f/1.4, f/2.8, or f/4.0) to allow maximum light into the sensor.
- ISO Sensitivity: Set ISO between 800 and 3200 depending on ambient darkness and how well your camera handles digital noise.
- Shutter Speed (Exposure): Use 1 to 5 seconds for bright, rapidly dancing auroras. If the auroras are dim and slow, extend the exposure to 8–15 seconds.
- Focus: Disable Autofocus. Turn targeting to Manual and focus your lens precisely at infinity (∞) or align focus on a bright, distant star in live-view.
3. Photographing Auroras with a Smartphone
Modern smartphones can capture excellent aurora shots thanks to computational night imaging modes:
- **Enable Night Mode:** Switch on your phone's night capture mode. If the phone detects it is perfectly still (on a phone tripod or propped against a rock), it will automatically stretch exposure times to 10–30 seconds.
- **Shoot in RAW:** If your device supports it (e.g., Apple ProRAW or Android Pro/Manual Mode), take photos in RAW format for better noise correction in post-processing.
- **Turn off Flash:** Ensure your flash is completely disabled. Flash only lights up objects right in front of you and ruins the cosmic colors.
4. Compose with an Interesting Foreground
A photo of just green sky can look flat. Try to compose elements in the foreground: snow-covered trees, distant fells, a cabin, or reflections over a lake. Foreground elements add perspective, scale, and context, making your final image much more compelling.
Scientific sources and references:
- Finnish Meteorological Institute - Northern lights observing tips.
- Sodankylä Geophysical Observatory - Photographic aurora camera systems.